DIY Wreck Markers

After getting my battle force together I realized there was one thing I needed. That thing was wreck markers, tokens used to represent destroyed warjacks, the steam & magic powered robots that dominate the game. As a modeler and collector of sundry machine parts, I new I had a project on my hand.
Having been recently introduced to Warmachine by the good people at Moonlite Comics, I've once again submerged in the skirmish wargaming hobby, drafting army lists, painting miniatures, constructing terrain, developing strategies, and finding new inspiration for creating all the extra bits and bobs that bring life to the gaming table. But after getting my battle force together I realized there was one thing I needed. That thing was wreck markers, tokens used to represent destroyed warjacks, the steam & magic powered robots that dominate the game. As a modeler and collector of sundry machine parts, I new I had a project on my hand.
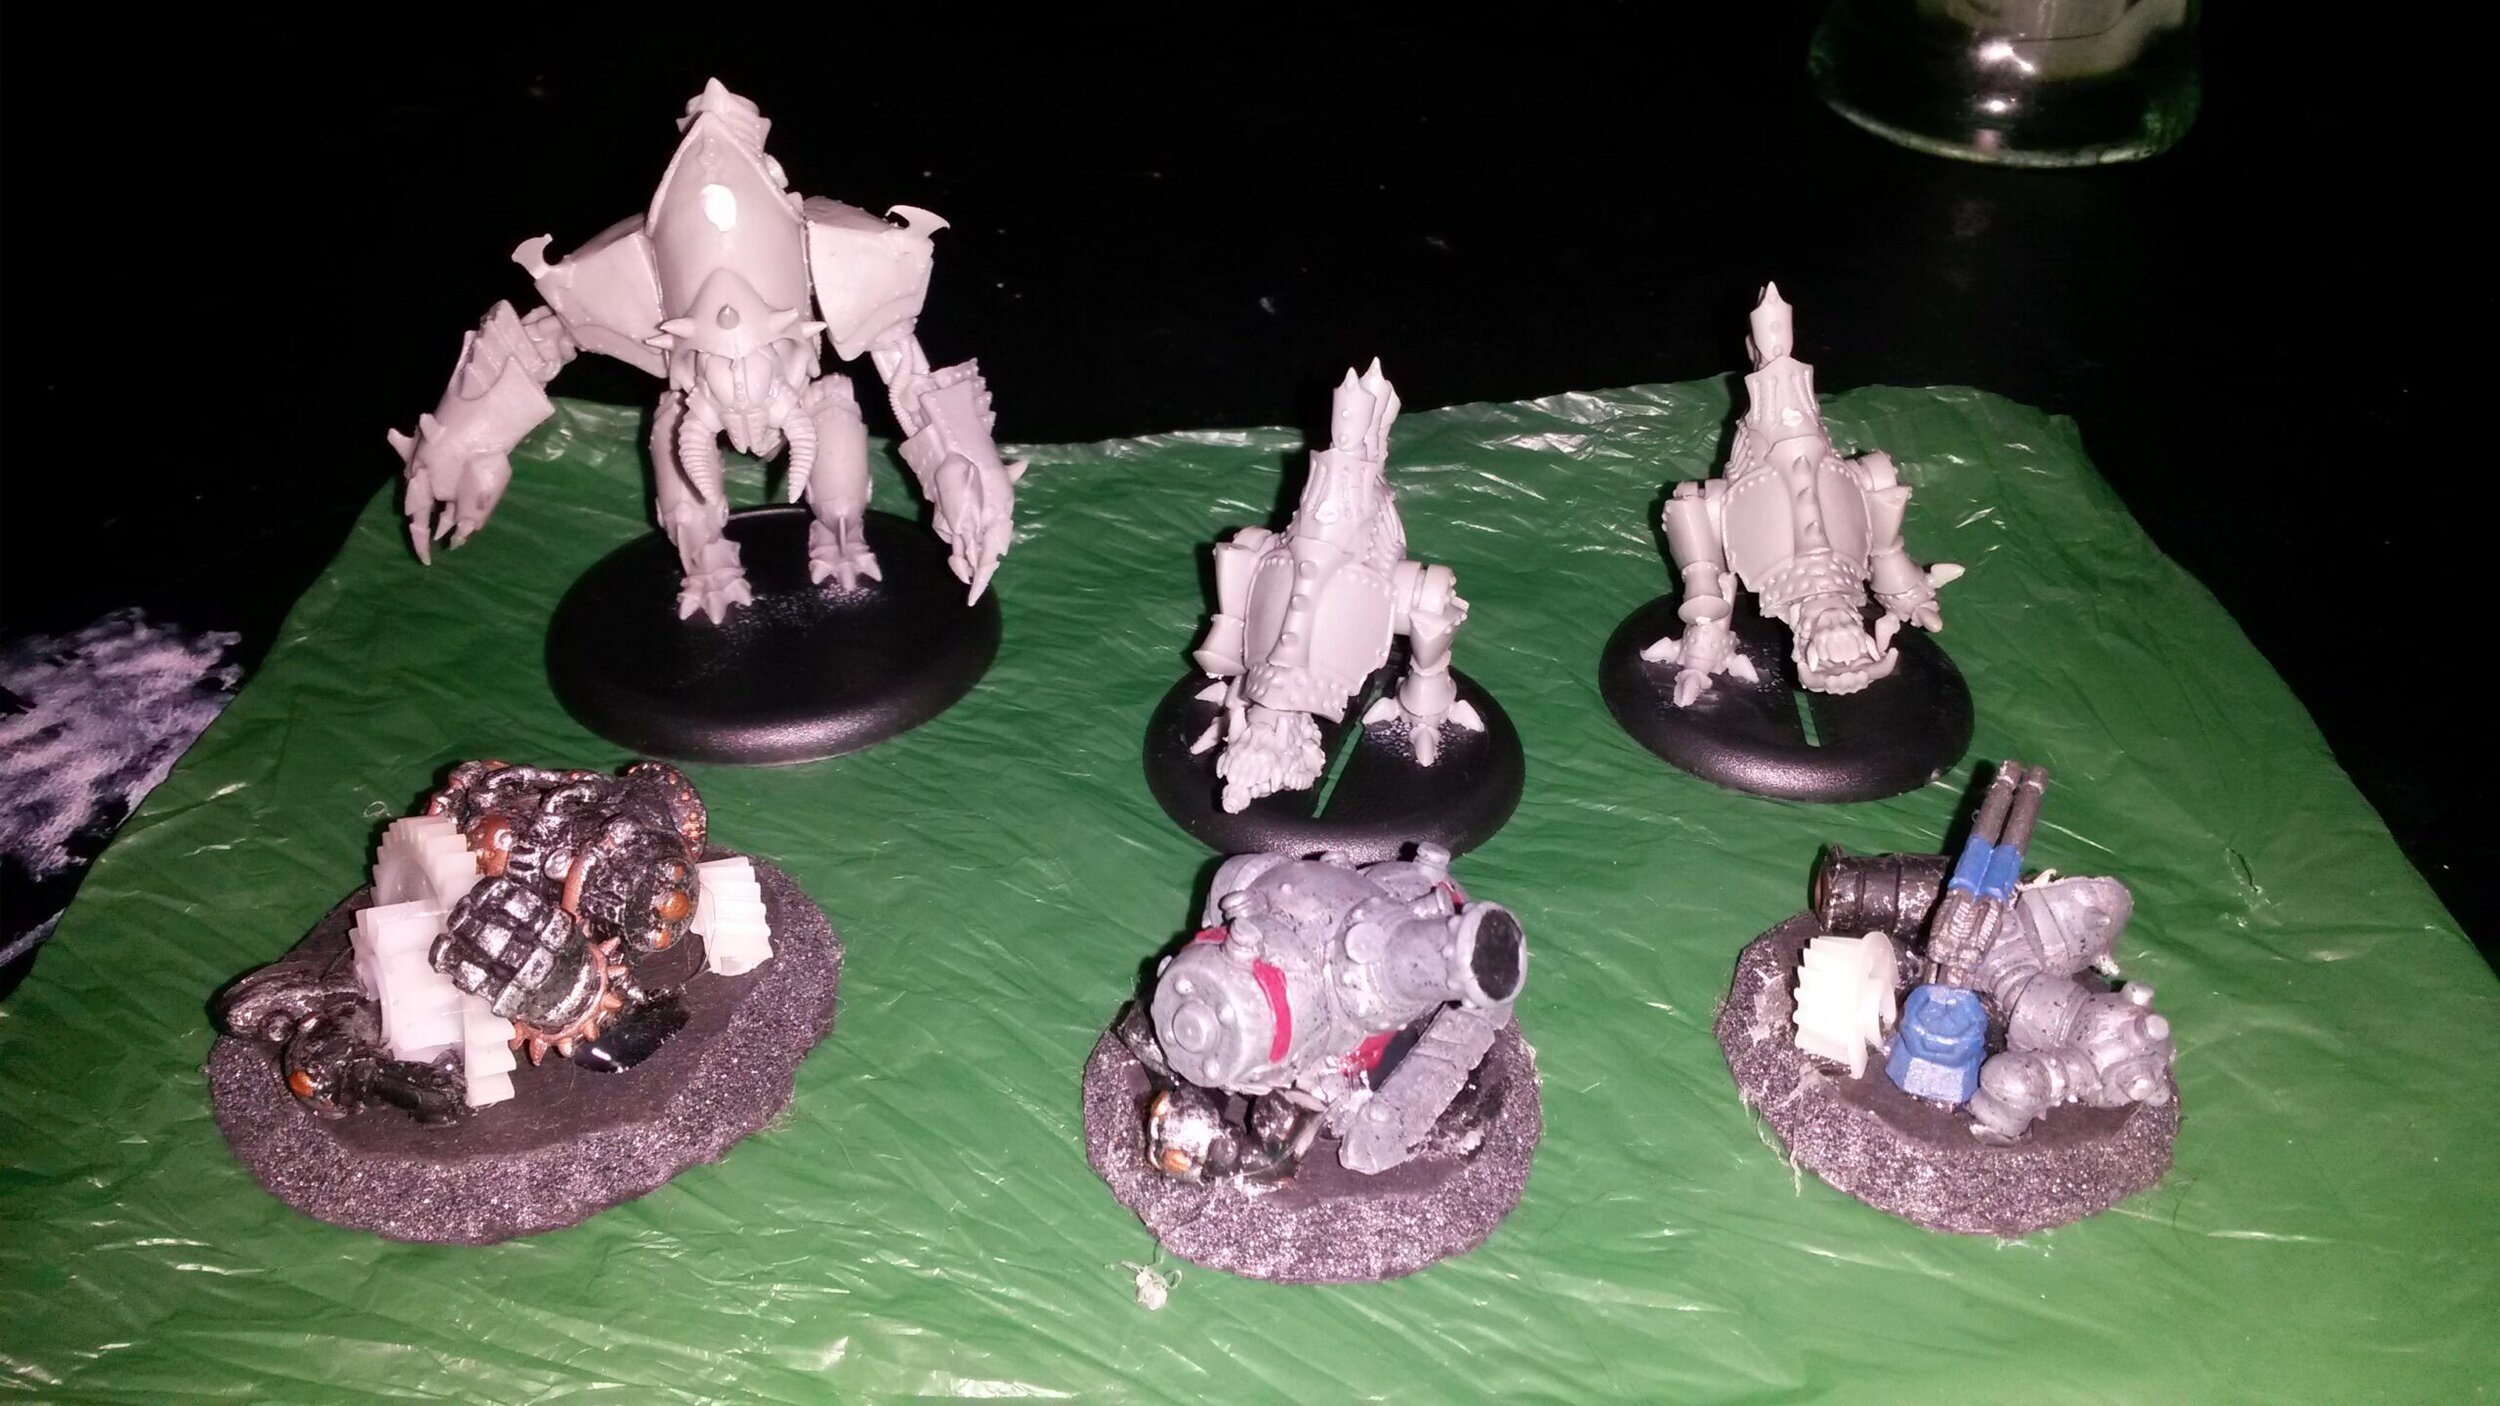
My wreck markers began with foam core board, the wargame hobbyist's most versatile resource. Using the bases of my warjacks as a template, I cut out a set of foam core disks using a fresh modeling knife. Then I weathered the edges of each disc, cutting around the edges to create the impression of a low dirt mound or crater, which will go a long way towards making the markers look like a natural part of the battlefield.

For the wreck itself I used two components. First, I turned to my box of old machine parts. I gathered up a variety of plastic gears, most of which were salvaged from an old office laser printer. Using my modeling knife, I cut the gears in half at odd angles, all the better to make them stick out of the marker at dynamic angles. Second, I got out my box of plastic Mage Knight miniatures, which happens to include countless golems, steam machines, and mechanical knights. I hacked away at three miniatures, removing limbs, weapons, and torsos until I had a nice collection of robot parts. I experimented with a few possible arrangements, eventually hot-gluing gears and robot parts to the foam core disks until I had a set of wreck markers perfect for representing my fallen jacks (or better yet, the jacks of my unfortunate opponent).

What you see are my assembled wreck markers. Next comes painting the marker and base, which we'll review in my next DIY wargaming article.